A feature wall can instantly make a living room feel more intentional, adding depth and character without a full renovation. The key is choosing the right surface (often the wall behind the sofa, fireplace, or TV), then matching colour, texture, and lighting to the way you actually use the space. Deep blues, greens, and charcoals create a cosy, evening-friendly mood, while warmer terracottas and ochres bring energy for social rooms. If paint feels too simple, wallpaper, slatted panelling, or subtle texture can deliver impact without overwhelming the rest of your décor. Keep sight lines in mind, avoid walls broken up by doors and windows, and test samples across morning, afternoon, and lamp light before committing. At Friendly Turtle EcoBlog, we love home updates that look great and last: thoughtful choices, quality finishes, and flexible styling that won’t date after one season.
Share your articles with us and get published! Reach out at hello@friendlyturtle.com.
How To Insert A Menstrual Cup And Keep It Clean - Green Period Guide

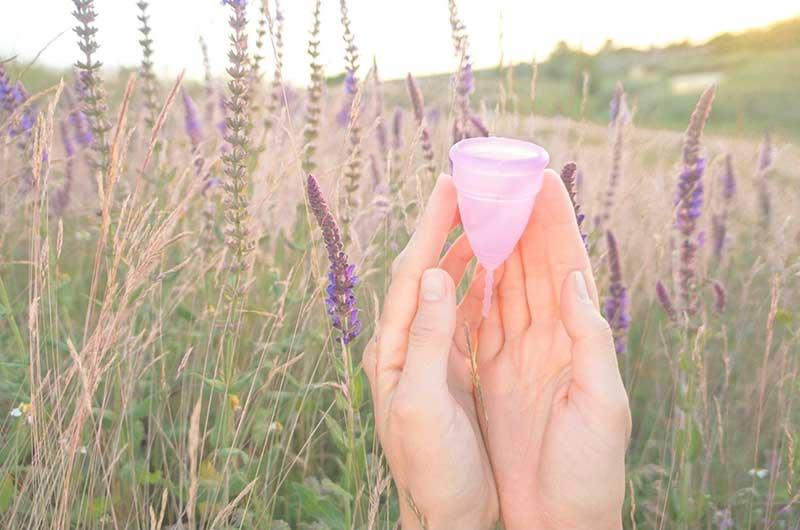
In this blog post, we're going to be answering two of the most common questions we get asked here at FT - how to insert a menstrual cup and how to clean a menstrual cup.
When it comes to that time of the month, there seems to be endless options on how to help you through it. From tampons to pads, to menstrual cups and other green products - the choices can feel overwhelming. However, more and more women are turning to a greener choice that will be long-lasting: The Soft Menstrual Cup.
In the average time a person menstruates, they will have thrown away over 400 pounds of packaging from the single-use plastic tampons and pads that are so commonly used. There is a way to change this. With the menstrual cup alternative, women are able to buy one product that can last them up to 10 years, causing less waste to be made and less money spent on period products. In this article, we will give you the best tips on how to start using a menstrual cup, how to clean a menstrual cup, and how to insert a menstrual cup so you can green up your period!
What Menstrual Cup Should You Buy?
You’ve made the choice to explore greener options for your period. Congratulations! This is the first step in making a big environmental impact. However, there are many different varieties of menstrual cups and it can be hard to know which one would be right for you.
Know that it may take some trial and error! If you can think about when you started to use pads and tampons, it took a while to know which brand/size was best for you. The same goes for menstrual cups. While many are the same style, they come in different sizes. Carefully read each brands sizing guides to understand what size will work for you. (Tip: Try measuring your cervix to find the best size for you. Use these step-by-step instructions to find the best way to find your size).
How to Clean A Menstrual Cup
There is a bit of a preparation that goes in at the beginning of each cycle when it comes to how to clean a menstrual cup, but don’t worry! It does not take long at all.
1. Pre-Period Preparation
Get a pot of water and set it to boil. This will set up the sterilization process. You want a clean product going into using it. Set the cup in a pot of boiling water and let it boil for 5-10 minutes. Once the time has passed, carefully remove the cup and set it on a clean towel to cool off. With clean hands, you can take the cooled down cup and give it a wash with antibacterial soap to get it extra clean. Rinse it off and your cup is good to go!
Another great option to make the whole process a lot quick is to use a menstrual cup steriliser. A great choice and super simple to use - just pop it in the microwave instead!
2. Daily Maintenance
A menstrual cup can be left in for a longer amount of time than a pad or, say, organic tampons. Some menstrual cups can be left in for 12 hours while others around 8 hours. Check with the brand of your cup before you determine how long you can leave it in for.
Once you are ready to empty it, after you take it out, you can dump the contents of the cup into the toilet and simply flush it down. Afterwards, you can give it a quick rinse in the sink with some water before inserting it in again.
*Note that some cups will have to be emptied more frequently based on the heaviness of your flow.

How to Insert a Menstrual Cup
Now is the time to insert the menstrual cup. For those who have never done it before, it can feel stressful to know the best way to do it. The number one tip while you are learning how to insert a menstrual cup is to RELAX! Take some deep breaths. You’ve got this! The more relaxed you are, the easier it will be to insert.
1. Choose Your Fold
There are many different ways you can fold your cup to insert it. Check out this article to see the list of folds and watch a short video on how to do them. This will all be based on your comfort level and may need some testing before you find the perfect fold for you.
2. Find A Position
While many women insert their menstrual cups while sitting. Some have found that standing is more helpful. This again will come with practice and may need some trial and error.
3. Don’t Be Afraid To Use Some Help
It can be hard to initially insert the cup. If you are finding it is not going in smoothly. Try using some water around the rim or some water-based lubricant to help it go in smoothly. This is very common and will not impact the seal on the cup. This will also help you to remain fully relaxed!
Entering into the world of menstrual cups does not have to be overwhelming. In fact, it is an exciting time that you’ve decided to go green with your period. And now we've answered the most common questions 'how to clean a menstrual cup' and 'how to insert a menstrual cup', you can be sure you'll be getting off to the best possible start with your new eco purchase.
If a menstrual cup sounds a little too much for you at this stage, then another great 'green' choice would be reusable sanitary pads. These can also be reused and helps eliminate our reliance on the throwaway products we've become so used to.
Check out our range of eco friendly period products to see the different products and brands we carry that can help you green your period!
0 comments
Let customers speak for us
Blog posts
Good oral health starts long before the first wobbly tooth. When children learn simple routines early, they’re far more likely to avoid cavities, gum irritation and the stress of emergency appointments later on. Begin with regular dental check-ups so small issues are spotted quickly and visits feel normal, not scary. At home, let your child choose a toothbrush they actually like, then guide them through gentle circular brushing for two minutes, twice a day. Add flossing as soon as teeth touch, and keep it upbeat with a short story or a timer song. For a more planet-friendly routine, pick durable brushes (or responsibly sourced bamboo), turn off the tap while brushing, and choose refillable or recyclable packaging where possible. Friendly Turtle EcoBlog shares practical, low-waste lifestyle ideas like these, helping families build habits that protect little smiles while treading lighter on the Earth.
Preventive care is one of the kindest, most sustainable choices you can make for your pet. Many health problems start quietly: a little plaque, a mild itch from parasites, a gradual dip in energy, or stiffness that only shows up after rest. Left alone, these “small” issues can build into painful dental disease, weight-related strain on joints, or conditions that affect the heart, lungs, liver, or kidneys. In this Friendly Turtle EcoBlog guide, we share practical habits that protect pets over time, from parasite control and lifestyle-led vaccinations to age-appropriate nutrition, daily movement, and simple grooming checks that spot changes early. Consistent routines also matter more than most owners realise, helping you notice subtle shifts before they become expensive emergencies. The goal is not perfection, but steady, evidence-led care that keeps your companion comfortable, active, and thriving for longer.


